Automated Surgical Device Testing Fixture
Developed an automated electromechanical testing fixture for a urological surgical device.
Problem / Goal
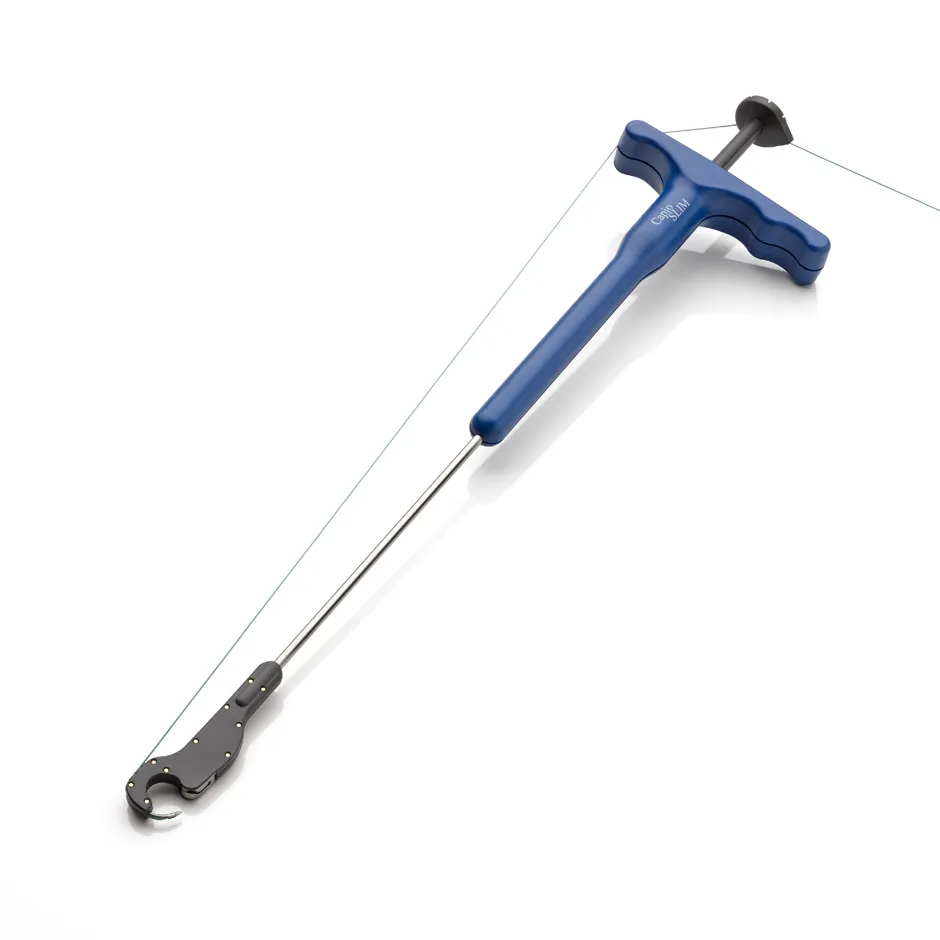
The Capio Slim is a suture-passing device used in pelvic floor reconstruction surgery. A surgeon loads a suture into the device head, compresses the plunger, and the internal carrier drives the suture through tissue and into a catch, where it can be retrieved and tied without a second instrument.
Clinician feedback had identified reliability issues with the device, and engineers developed a redesigned internal mechanism in response. That redesign needed to be validated before FDA submission.
Existing testing was done entirely by hand. A technician would actuate the device dozens of times per session, reorienting it between cycles to simulate real use — more than 20 minutes per device. The approach had real problems: the technician doing most of the testing had cut marks and scarring on his hand from accidental needle sticks, and developed hand cramps from hours of repetitive actuation. Beyond safety, manual actuation introduced force variability that compromised data quality, and counting hundreds of cycles by hand across long sessions was error-prone.
What I Did
The design process started with understanding what “representative testing” actually meant. Working from product specifications, I identified the actuation force and approximate speed that experienced operators applied to the device — the parameters that would define the core mechanism. I selected a linear actuator matched to those requirements, balancing cost, durability, and lead time against the risk of needing a mid-study replacement.
With the actuation approach defined, I modeled the full fixture assembly in SolidWorks. The frame combined aluminum extrusions with a milled aluminum mounting plate for the actuator, plus a set of custom 3D-printed components: holders for the device under test, a bracket for the LCD display, and a suture tensioning mechanism. That last part took the most iteration. The goal was to maintain consistent thread tension as the suture was pulled through the device; I eventually landed on a tortuous-path design using a printed part and a metal pin that tugged on the thread passively. Once the design was finalized, I ordered the parts and assembled the frame.
Electronics and firmware came next. I started by designing the state machine and documenting it as a PlantUML diagram, mapping out how the fixture would register user input through callback functions, transition between actuation and idle states, and handle interrupts. The fixture ran two actuators: one compressing the device plunger, one translating a silicone tissue model into position to simulate the target anatomy. Both required precise timing to fire in the right sequence. I wrote the firmware in C++ using Arduino, controlling the actuators through dedicated motor controllers.
The control panel gave the operator full visibility without requiring them to watch the fixture. An LCD display counted each actuation in real time, and buttons let the operator reset the count between devices, power cycle, and start or stop a run. I added touch sensors on the fixture housing and a dedicated emergency stop, both wired into the state machine as interrupt conditions.
To finish, I mounted all the electronics in an enclosure with DIN rails and labeled terminal blocks, organizing components so they were easy to identify, trace, and swap. What started as a collection of separate mechanical and electrical problems came together into a system that ran autonomously, consistently, and safely.
Results
The fixture reduced per-device test time by 75%. To validate that the automated method was statistically equivalent to the manual one, I ran a Gage R&R study, which passed and earned sign-off from senior R&D. I presented the results to a panel of managers and engineers at the end of the co-op. Boston Scientific extended me a return offer for my work.
What I Learned
Before this project, my instinct was to start building and figure things out as problems came up. That works fine for low-stakes personal work, but here the components were expensive, the timeline was fixed, and the output had to meet a regulatory bar. I learned to slow down at the start — to map out the full system, think through how the parts would interact, and pressure-test the design on paper before ordering anything. Being more methodical at the start is what kept the build on track.